


Best Positions on Anubis
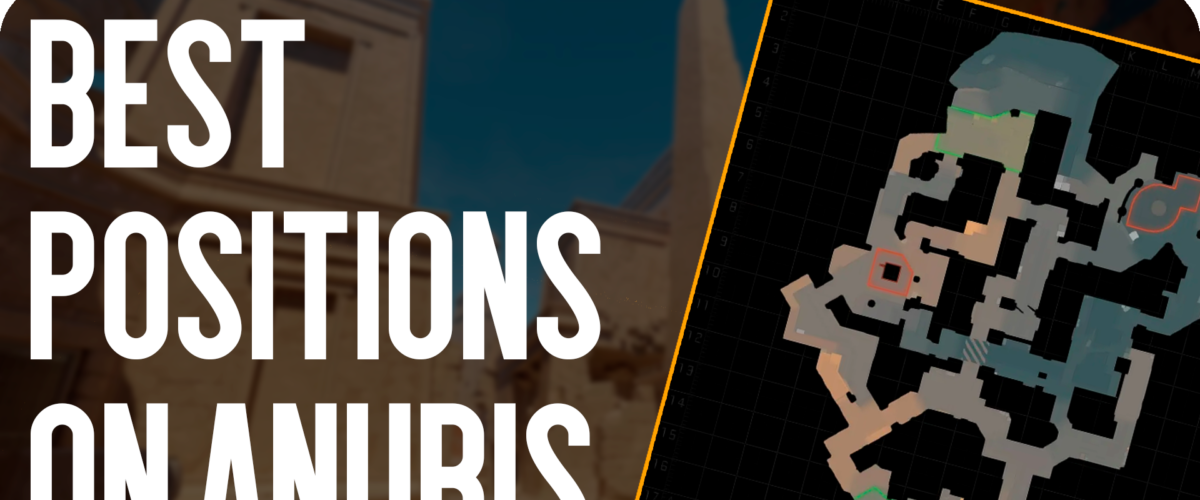
Best Positions on Anubis
For a player who is starting to take Anubis seriously, the map can look chaotic: water, bridges, narrow corridors, different elevations and a huge number of angles. However, the location of the key positions determines who gets an advantage before the first duel even begins. Once you understand where to stand, when to fall back and which areas cannot be given away for free, Anubis becomes much easier to read.
In 2026, the map is particularly relevant in ranked play because Anubis returned to the Active Duty pool at the start of the fourth Premier season, replacing Train. Valve continues to develop CS2 and release updates, so some old CS habits do not always work in exactly the same way.
In this guide from Csgo-news.com, we will cover the best Anubis positions CS2 for both Terrorists and Counter-Terrorists, explain how to play Anubis through mid control and show which spots are especially valuable for AWP players, riflers, entry fraggers and support players.
Which Anubis positions should you learn first?
You do not need to memorize every callout in one evening. Start with the areas around which most rounds are built.
| Position | Side | Purpose |
|---|---|---|
| Mid | T/CT | Central control and rotations |
| Water | T/CT | Hidden routes and flanks |
| Bridge | T/CT | Upper-mid control |
| A Main | T | Main A entrance |
| Connector | T/CT | Link between Mid and A |
| Heaven | CT | Strong elevated A position |
| B Long | T | Main B approach |
| Gate | T | Main B entry |
| Pillar | CT | B-site cover |
| Sniper | CT | Long AWP angle |
| Palace | T/CT | Alternative route and split |
| Back Site | CT | Defensive fallback |
The main feature of Anubis positions CS2 is that they should not be viewed separately. A player in Mid affects both A and B, Water control opens additional routes, and taking Connector allows the attacking team to change direction with very little warning.
Do not judge a position only by how many kills it produces. A player who gets no kills for several rounds but constantly controls Water can create more value than someone who searches for a duel every round.
Mid is the most important area of the map
If you have to choose one area to study first, choose Mid. Several routes pass through the center of Anubis, and controlling it allows the attacking team to change direction quickly.
The map has a vertical split in Mid. Bridge is above, while Water runs underneath. These two levels create completely different opportunities.
T-side players can:
- check early CT aggression;
- take Water;
- move toward Connector;
- prepare an A hit;
- force the defense to react to B pressure;
- keep a late split available.
CTs should not simply give away Mid. If the attackers gain both Mid and Water, they get too many possible continuations.
How to play Anubis through Mid:
- Do not repeat the same opening every round.
- Check for early enemy aggression.
- Use utility instead of giving Mid away for free.
- If you gain Water, you do not have to attack immediately.
- Use central control to pressure both bombsites.
That is why good Anubis positions CS2 should be treated as a connected system. Mid is not simply a place for gunfights; it is a tool for controlling the entire map.
Water is a position for smart flanks
Water is often underestimated by players who rely only on standard approaches. In reality, the water route allows you to create pressure where the enemy does not expect it.
Its biggest advantage is the ability to move and change direction with less exposure. If the defenders focus too heavily on Bridge, a T player in Water can gain space and reach Connector.
For T, one good option is to send one player through Water while the main group creates pressure elsewhere. The CT side then has to consider several possibilities.
However, there is one important rule: you do not need to fight for Water every single round.
If the enemy repeatedly throws utility there and plays aggressively, use that reaction against them. Show presence, wait for the response and then switch toward A or B.
Player feedback: Water is often described as one of the most annoying areas of Anubis because of unexpected flanks. At the same time, players frequently point out that trying to control it alone without support quickly leads to a trade.
Best positions on A
A Main
A Main is the primary T route onto the site. This is where the entry player needs to move quickly once the utility lands.
The biggest mistake is walking out alone and stopping in the doorway.
Instead:
- use a flash before entering;
- wait for the smoke;
- let the first player clear dangerous angles;
- have the second player ready for the trade;
- keep moving after entering.
A Main becomes particularly strong when combined with Connector. While the CT player watches the main group, the second route creates another angle.
Heaven
Heaven is one of the key CT positions on A. Its elevation gives defenders a strong view over the site and the entry path.
It is especially useful for an AWP player. You can wait for the smoke to fade, secure a kill and reposition.
But staying there forever is a mistake. If the Ts control both A Main and Connector, Heaven can become a trap.
Tip: after the first shot, reassess the situation. If your team has lost A Main and Connector, reposition instead of waiting for another contact.
Connector
Connector is one of the most valuable positions for both sides.
For T, it creates an unexpected route onto A. For CT, it is an information point that connects the defense to Mid.
A Connector player should listen carefully. On Anubis, information is often more valuable than the first kill.
Best positions on B
B is different from A because fights are tighter and cover plays a larger role.
The goal is not simply to reach Gate, but to arrive with enough players to trade.
If three Ts approach B Long but one dies before the entry, the attack becomes much harder. Entry players therefore need support.
Gate
Gate is the critical point before entering B. This is where the round often determines whether the attacking team can even reach the site.
Do not enter Gate without preparation.
Before the hit:
- Throw a flash.
- Remove the dangerous angle.
- Smoke the long defensive position.
- Let the first player create space.
- Have the second player ready for the trade.
Pillar
Pillar is one of the strongest defensive positions on B. The cover allows the CT player to survive the first wave of utility and fight after the attackers commit.
But there is a catch: once the Ts control several routes, staying behind Pillar becomes dangerous.
A strong defender does not simply hide. They understand when to make first contact, when to fall back and when to call for support.
Player feedback: Pillar is popular among defenders because it can absorb the first contact, but players often note that remaining there after losing Gate and Palace control becomes extremely risky.
Palace is the position for unconventional play
Palace is valuable because opponents do not always expect a full attack from there.
For T, Palace can be used as:
- part of a B split;
- a route after Mid control;
- a late-round exit;
- a flank;
- a way to force CTs away from a comfortable position.
You do not need to send one player there every round. If the opponent gets used to that pattern, show Palace pressure and then finish through B Long.
For CT, controlling Palace helps determine how many attackers are actually on the B side of the map.
Best AWP positions on Anubis
Anubis supports sniper play, but the AWP requires patience.
Useful positions include:
- Heaven on A;
- Sniper;
- long Mid angles;
- selected CT positions;
- long B approaches.
AWP is strongest when the player has teammates controlling the surrounding space. If you are alone against several routes, even a strong position quickly becomes useless.
The key rule is simple: change your angle after an important contact.
If you get two kills from the same spot, the opponent will almost certainly start checking it with grenades, flashes or prefire.
Best rifler positions
Riflers can play more actively on Anubis. Their job is not only to wait for the enemy but also to help the team gain space.
Good areas include:
- Mid;
- Water;
- Connector;
- A Main;
- B Long;
- Gate;
- Palace.
Riflers are particularly effective when paired with support players. One opens the angle while the second prepares the trade.
When playing alone, avoid extended AWP duels. On Anubis it is often better to take space, force the defender back and continue pressure.
How to play Anubis on T side
Your default should be flexible.
A basic setup can be:
- two players controlling Mid;
- one checking Water;
- two players leaning toward A or B.
But this is not a fixed formation. Its purpose is to gather information.
After the first 20–30 seconds, answer three questions:
- Where is the AWP?
- How are the CTs distributed?
- Which area are they giving away for free?
If CTs are too aggressive on A, switch direction. If they fully commit to B, pressure through Mid and Connector can force mistakes.
An Anubis guide for T side should always revolve around changing tempo.
Sometimes the right decision is to hit within 20 seconds. Other times it is better to spend almost a minute taking map control and execute late.
How to play Anubis on CT side
CTs should not play only from the bombsites.
If two players always stand on A and two always stand on B, T players will quickly understand the defensive structure.
Use:
- early utility;
- aggressive Water checks;
- Mid control;
- changing AWP positions;
- double peeks;
- early fallbacks after information.
Do not give Mid away for free.
If T has Mid, Water and Connector, CTs are forced to guess where the attack will go. Guessing on Anubis is usually a bad strategy.
How to play Anubis after the first kill
The first kill does not automatically mean you should push.
If T kills a CT on B, first evaluate:
- whether the defense can rotate;
- where the AWP is;
- how much utility remains;
- who controls Mid;
- whether another kill can be taken safely.
If CT gets the first kill, there is no need to force a push.
A common mistake is turning a 5v4 into an even round through unnecessary aggression.
Keep the advantage and force the enemy into an uncomfortable execute.
Positions after planting the bomb
After the bomb is planted, the map changes completely.
On A, T players do not have to sit directly next to the bomb. It is usually more useful to control the approaches.
On B, cover becomes even more important. A player behind Pillar or another piece of cover can force CTs to spend extra time clearing.
After the plant:
- one player controls the main entrance;
- another holds the alternative route;
- another plays for information;
- avoid making identical peeks at the same time.
CTs should remember that Anubis allows Water and other routes to be used for unexpected retakes.
Most common player mistakes
Even good aim cannot fix bad positioning.
1. Constant dry peeking
Walking into an open angle without flashes or smokes is usually a bad idea.
2. Playing the same position all match
The opponent quickly learns your habits.
3. Ignoring Mid
Without central control, it is much harder to read the opponent.
4. Pushing after every kill
A kill creates an advantage but does not require an immediate push.
5. Playing without trades
A Main and B Long are much stronger when players move in pairs.
6. Forgetting Water
Water is one of the main routes for unexpected attacks and retakes.
How to learn Anubis quickly
If you want to genuinely improve, do not try to memorize the map only during matches.
Spend 20–30 minutes in Practice.
First walk:
T Spawn → Mid → Water → Connector → A
Then:
T Spawn → B Long → Gate → B Site
After that, repeat the routes from CT side.
Do not only memorize names. Ask yourself: “What can I do from here?”
For example:
Heaven: hold A, use elevation, fall back after contact.
Water: flank, move safely, control Mid.
Connector: split, gather information, pressure A.
Pillar: hold B, survive the execute, prepare for retake.
This approach is much more useful than mechanically memorizing callouts.
What has changed in current CS2
In 2026, Valve continues to add gameplay changes and tools that affect how players practice. In March 2026, CS2 introduced limited map guides for Competitive and Retakes, available during the first rounds of a half. This makes independent map practice more convenient.
The core of Anubis, however, remains the same: space control, utility, Mid and Water pressure, and the ability to change direction quickly.
Old map knowledge remains useful, but it should be checked after major updates.
FAQ
What are the best Anubis positions CS2 for beginners?
Start with Mid, Water, A Main, Heaven, B Long and Pillar. These areas influence rounds frequently and help you understand the map structure.
How do you play Anubis on CT side?
Do not give Mid away for free, change positions after contact and use Water as an additional route for information and retakes.
How do you play Anubis on T side?
Gather information through Mid and Water, then choose A or B. Avoid repeating the same execute every round.
What is the best AWP position?
Heaven on A and Sniper provide strong long-range angles. However, the AWP player should reposition after important contacts.
Should you always control Water?
No. Water is important, but fighting for it every round can become predictable. Sometimes showing presence is enough.
Where can I find official CS2 information?
Current changes and official news can be checked on the Counter-Strike 2 page.
Should I practice positions separately?
Yes. The fastest method is to enter Practice, walk the main routes and train the positions you actually use in matches.
Where can I find more material?
More game guides, news and analysis are available on Csgo-news.com. Players interested in CS2 skins and items can also visit Forcedrop.vip.
Conclusion
Winning on Anubis is not about finding one perfect position. It is about understanding how positions connect. Mid creates space, Water provides unexpected routes, Connector links important areas, while Heaven and Pillar give CTs strong defensive options. On T side, do not turn every round into a direct rush: gather information, force the defense to reveal its structure and only then choose the site. On CT side, prevent the enemy from taking the center for free and keep changing your angles after contact. This approach turns simple callout knowledge into a practical Anubis guide that helps you win rounds. Spend several practice sessions on Mid, Water, Heaven, Connector, Gate and Pillar, learn when to hold a position and when to fall back, and the map will become much easier to read. 👉 Want to know more? Read here
Csgo-news.com will continue covering CS2 maps, positions and current gameplay mechanics from a practical player-focused perspective.



[…] 👉 Want to learn more? Read here […]